Alpha

Home  /  Install guide  /  Select the vault folder

Select the vault folder for your screenshot notes

One-time Shortcut setup. The Shortcut has two Save File actions — one for your notes, one for the per-job log file — and each needs to point at a folder in your Obsidian vault. Roughly two minutes.

Haven't picked a folder yet? You can use any existing Obsidian vault, or first create a dedicated destination folder.
Step 01

Open the Shortcut for editing

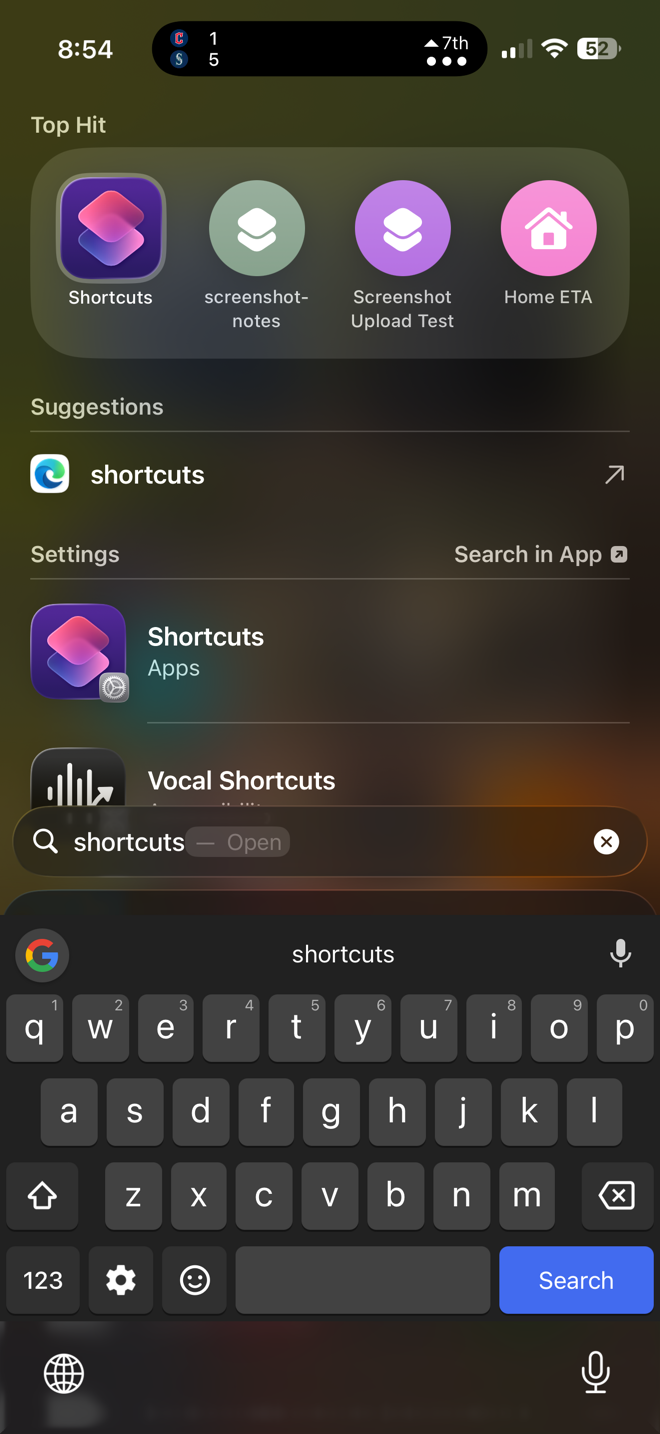
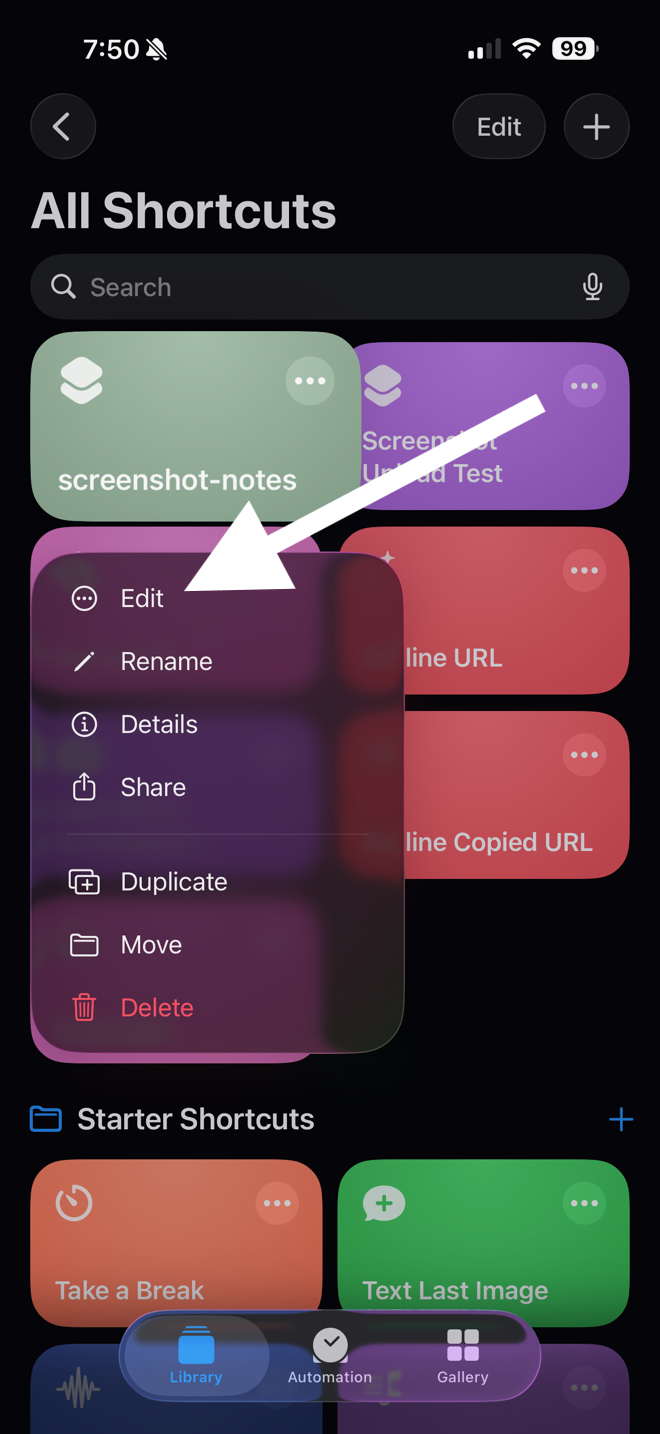
Navigate to the Shortcuts app on your phone and open it. Long-press the Screenshot Notes shortcut, then select Edit Shortcut from the context menu.

iPhone Spotlight search result showing Shortcuts as a Top Hit app, alongside the screenshot-notes shortcut suggestion.
Open the Shortcuts app.
All Shortcuts list with a long-press context menu open on the screenshot-notes shortcut. A white arrow points to the Edit item at the top of the menu.
Long-press the shortcut → Edit.
Step 02

Find the first Save File action

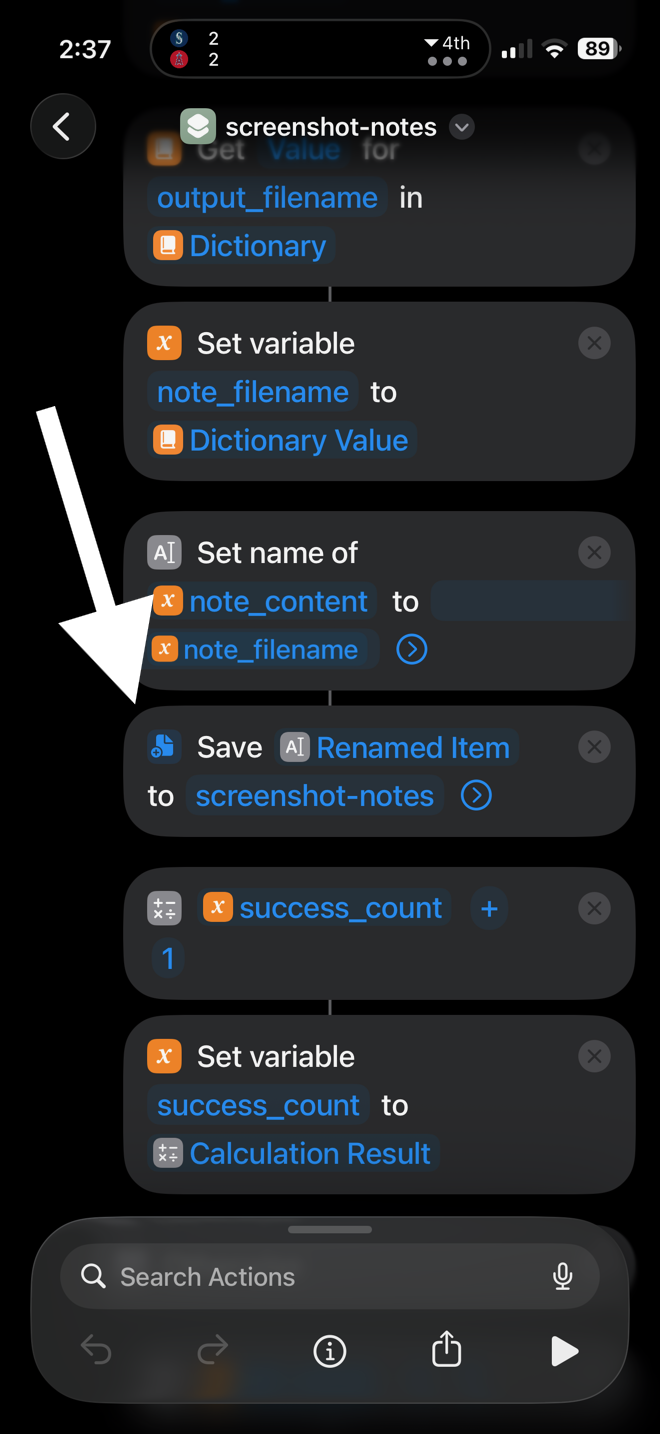
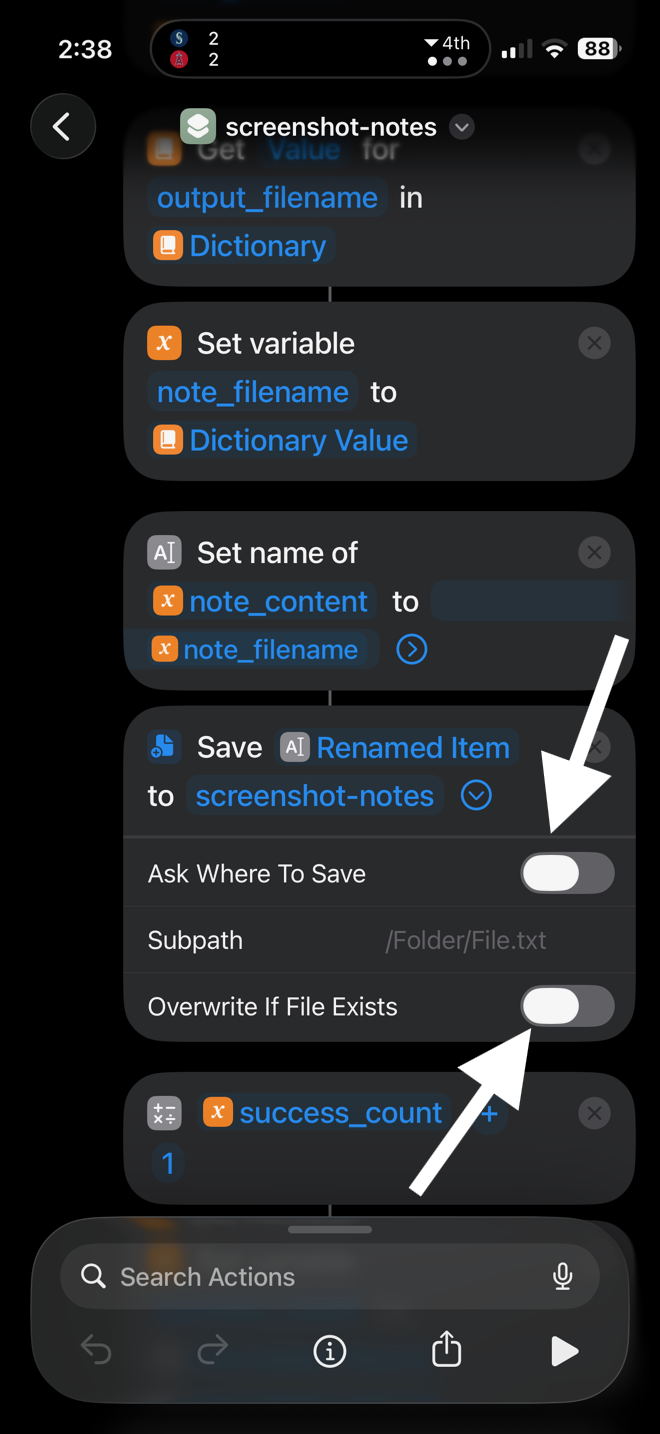
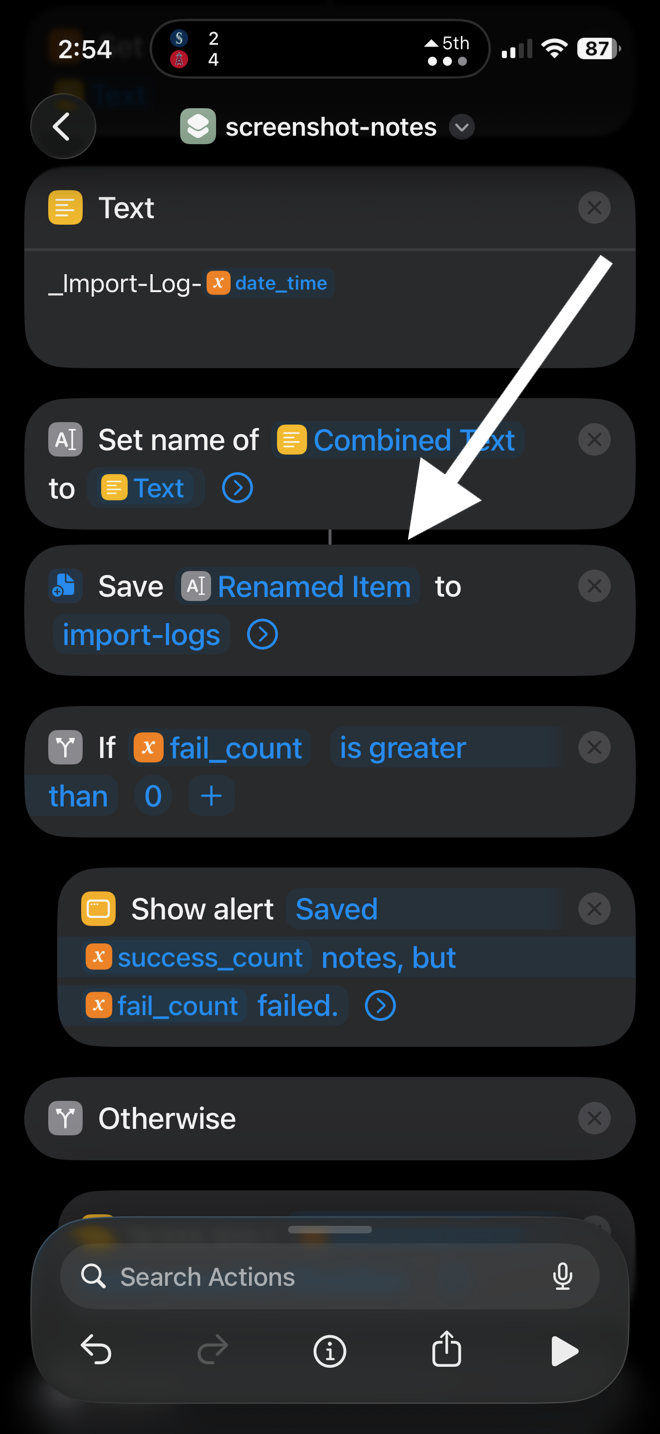
Scroll through the Shortcut's actions until you find the first Save File step. It reads:

Save Renamed Item to screenshot-notes

Tap the destination path field — the part that says screenshot-notes.

Shortcuts editor showing the screenshot-notes shortcut's action list. A white arrow points down to the Save Renamed Item to screenshot-notes action.
Find the first Save File action in the recipe.
Close-up of the Save action showing 'Save Renamed Item to screenshot-notes', an Ask Where To Save toggle (off), a Subpath placeholder, and an Overwrite If File Exists toggle. A white arrow points to the screenshot-notes destination field.
Tap the destination field (where it says screenshot-notes).
Step 03

Browse to iCloud Drive

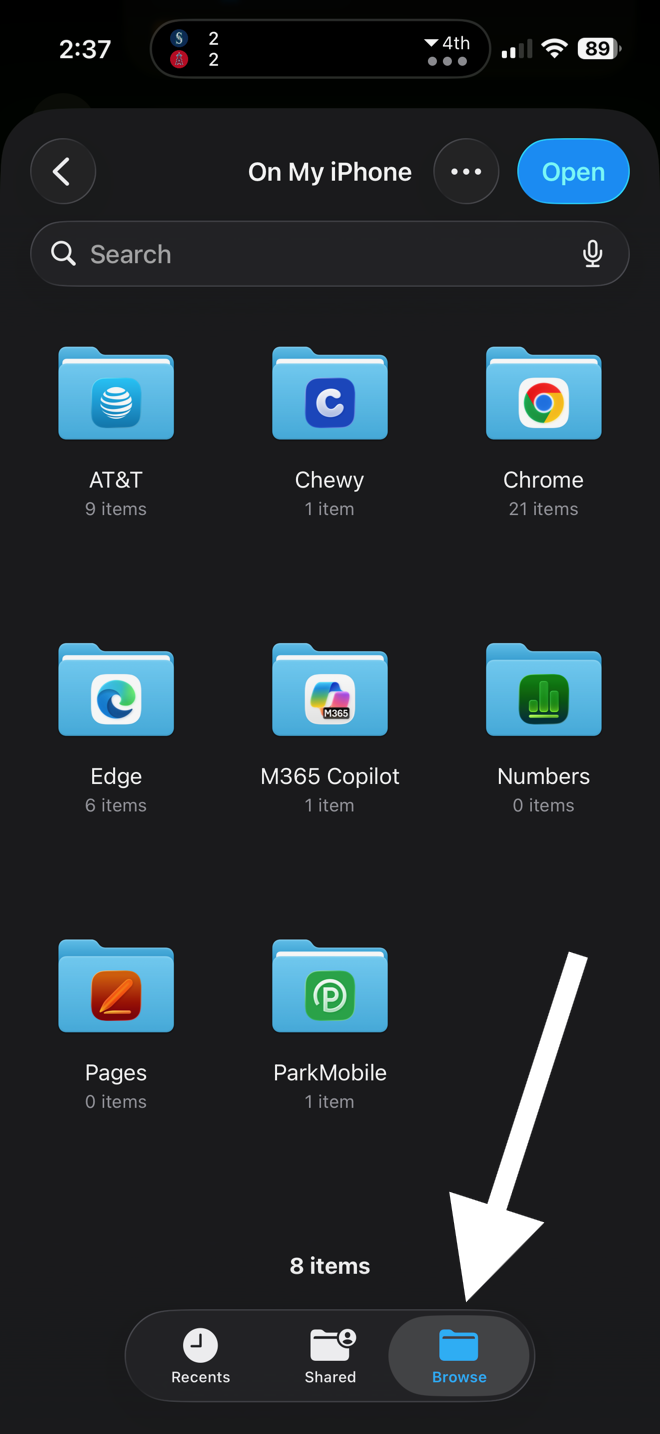
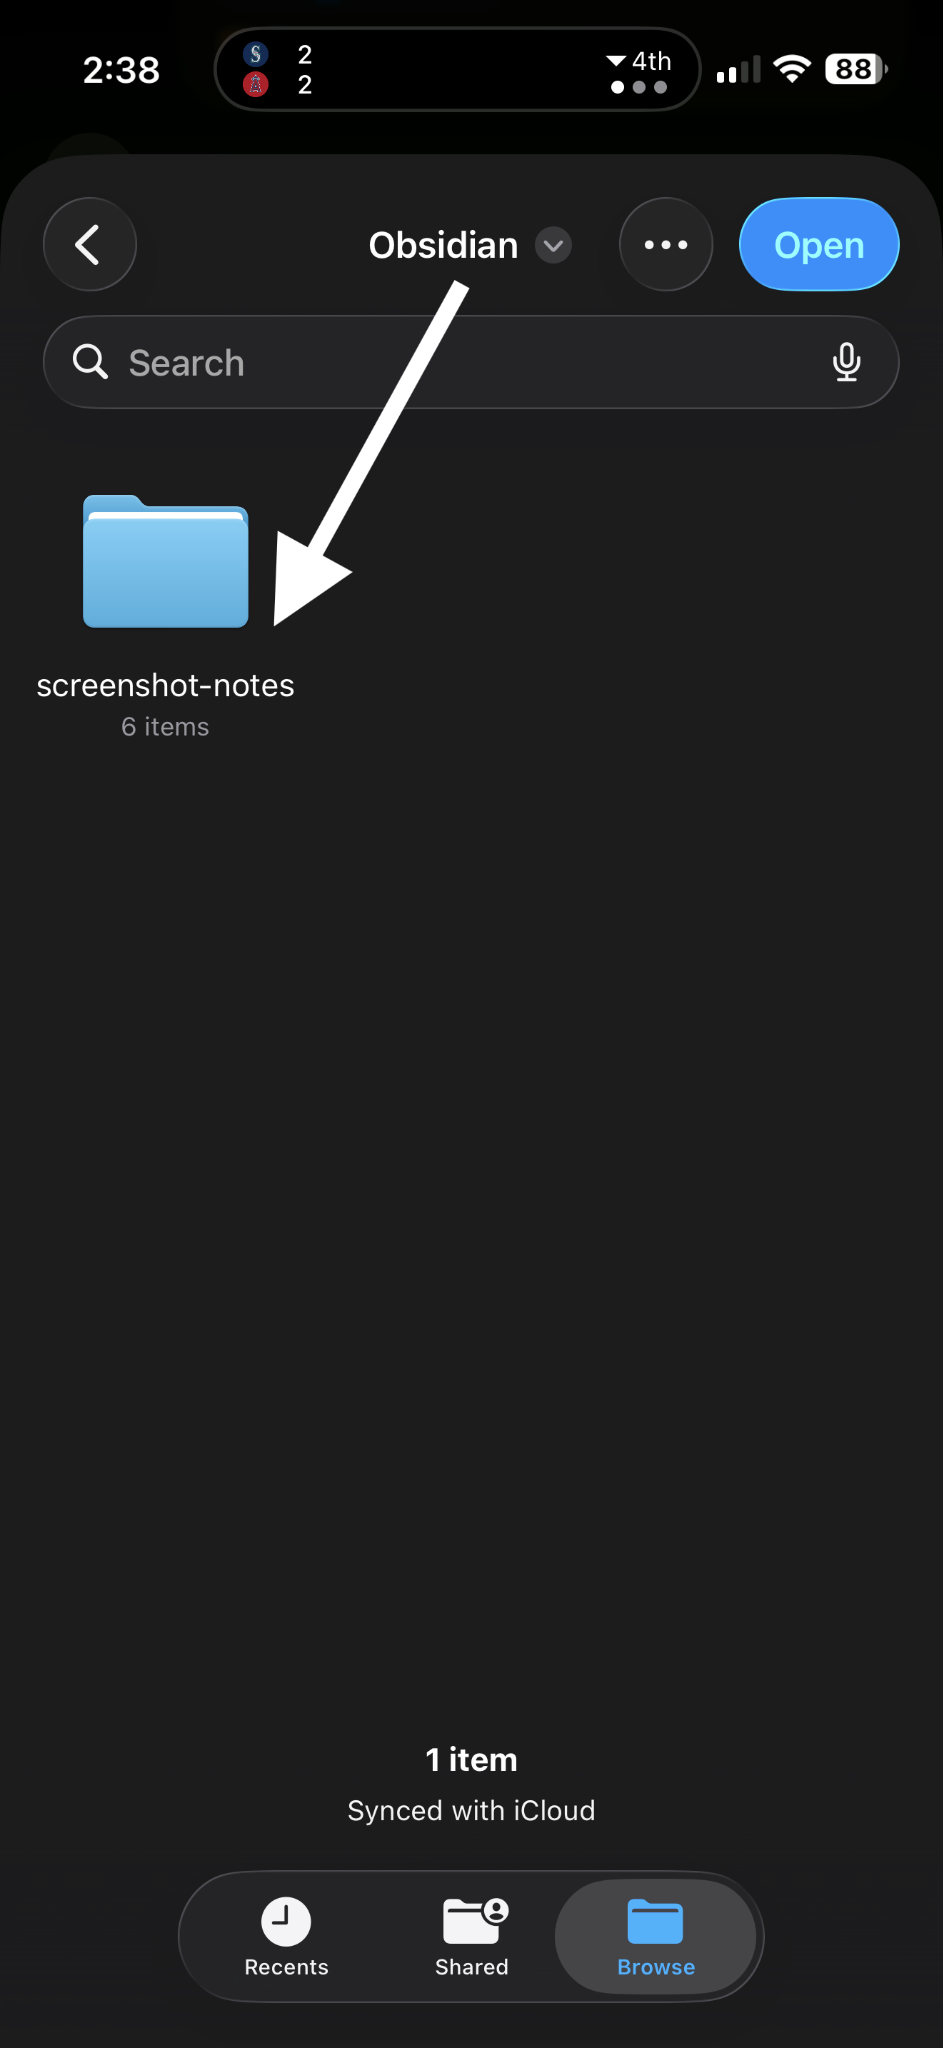
In the folder picker, tap Browse at the bottom of the screen. Then tap Browse again until you see Locations > iCloud Drive.

iOS folder picker showing 'On My iPhone' folders like AT&T, Chewy, Chrome, Edge. A white arrow points down to the Browse tab icon at the bottom.
Tap Browse at the bottom of the screen.
Browse view in the folder picker, showing Recently Used, Favorites, and Locations sections. A white arrow points to iCloud Drive under Locations.
Tap Browse again → iCloud Drive.
Step 04

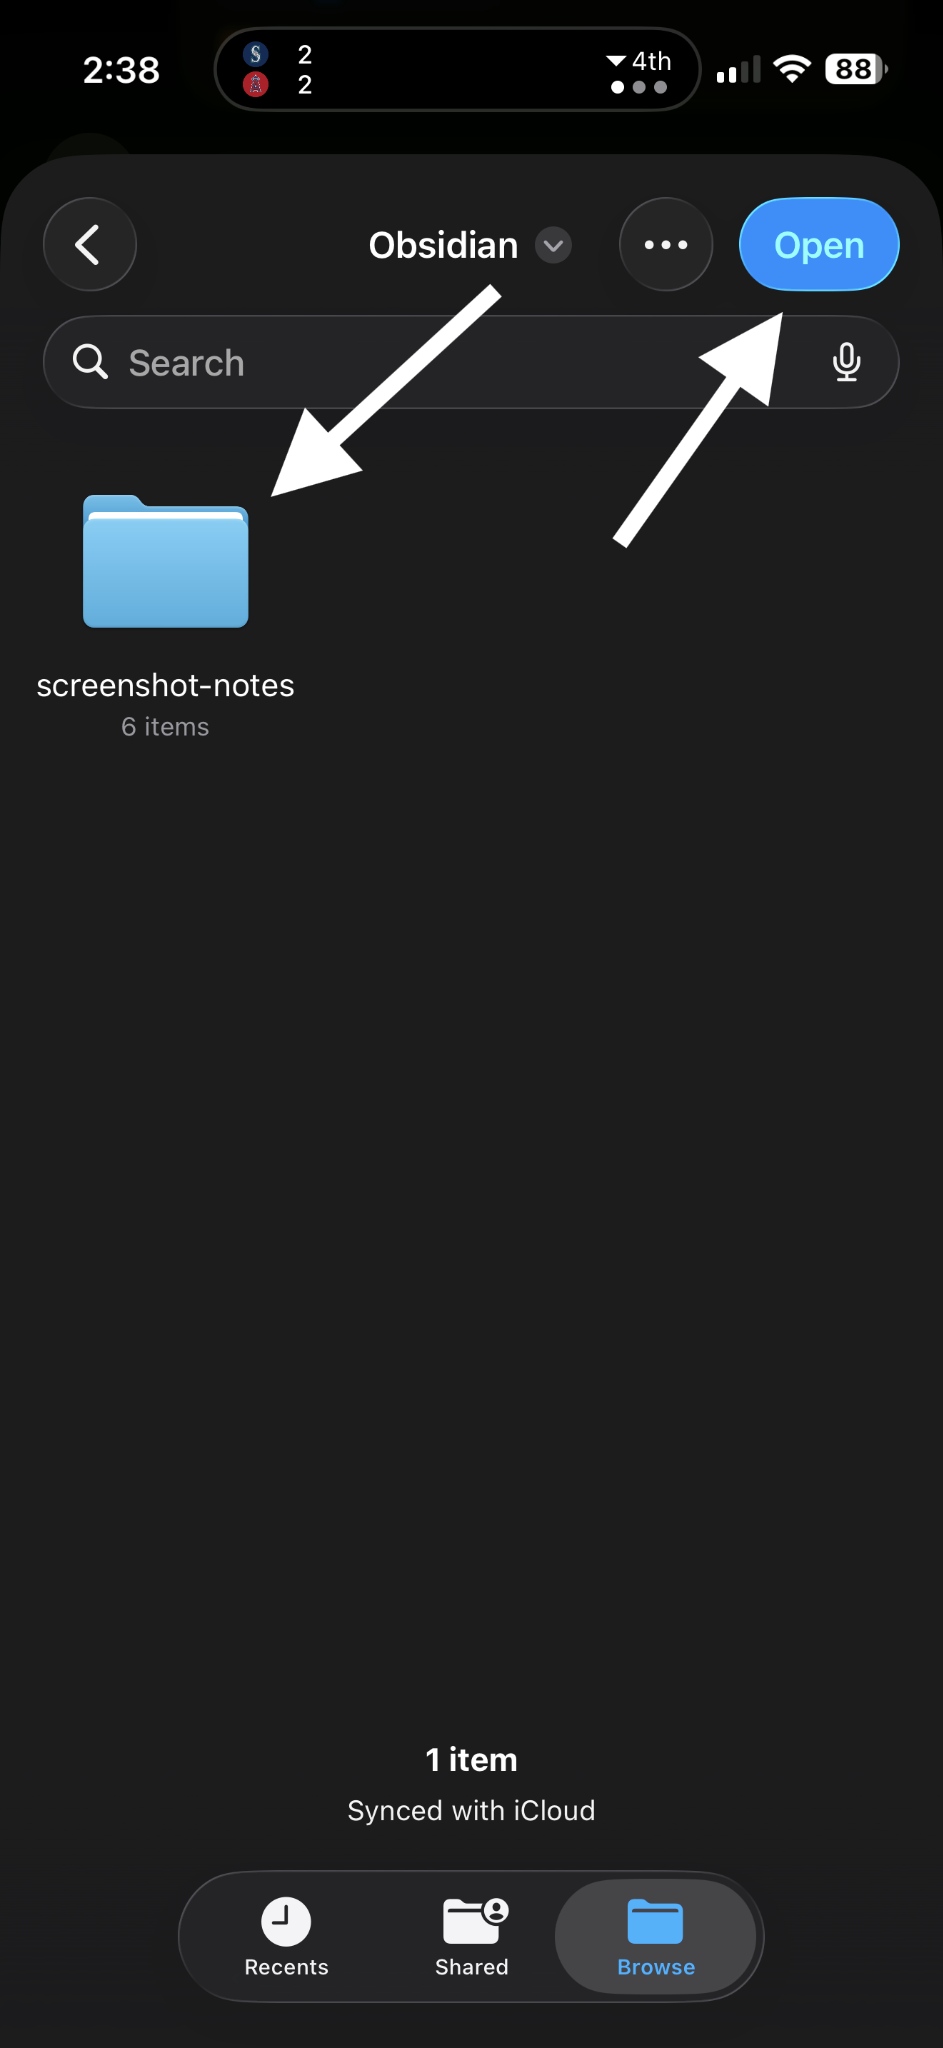
Pick your notes folder and tap Open

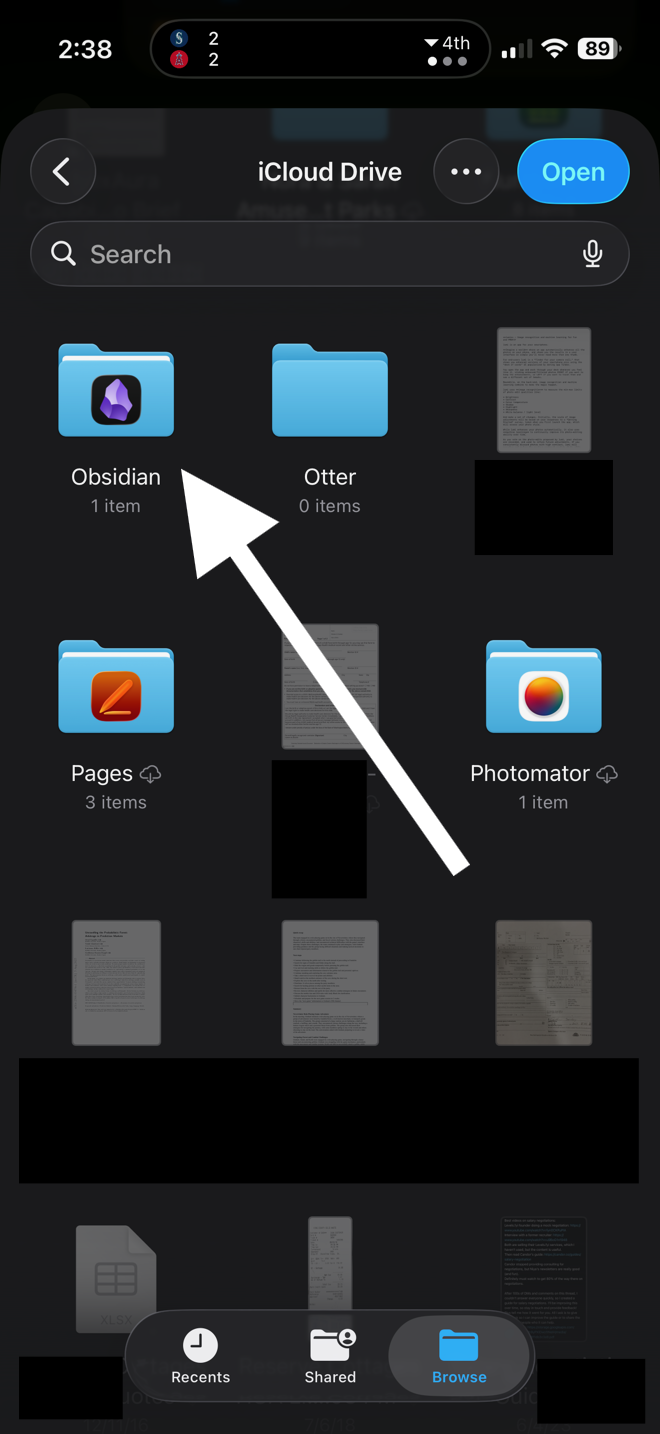
Navigate to iCloud Drive → Obsidian → [Your Vault Name] → ImportedNotes — or whatever vault / folder you chose on the Create a destination folder page. Then tap Open.

You can pick any folder you like — your vault root, a dedicated notes folder, or a subfolder. Whatever fits how you use Obsidian.

iCloud Drive folder picker showing the Obsidian folder highlighted, with an Open button in the top right and a white arrow pointing to the Obsidian folder.
Tap your Obsidian vault.
Inside the Obsidian folder, showing the screenshot-notes subfolder selected with the Open button highlighted. A white arrow points to the Open button.
Open your destination folder (e.g., screenshot-notes).
Step 05

Leave the toggles alone

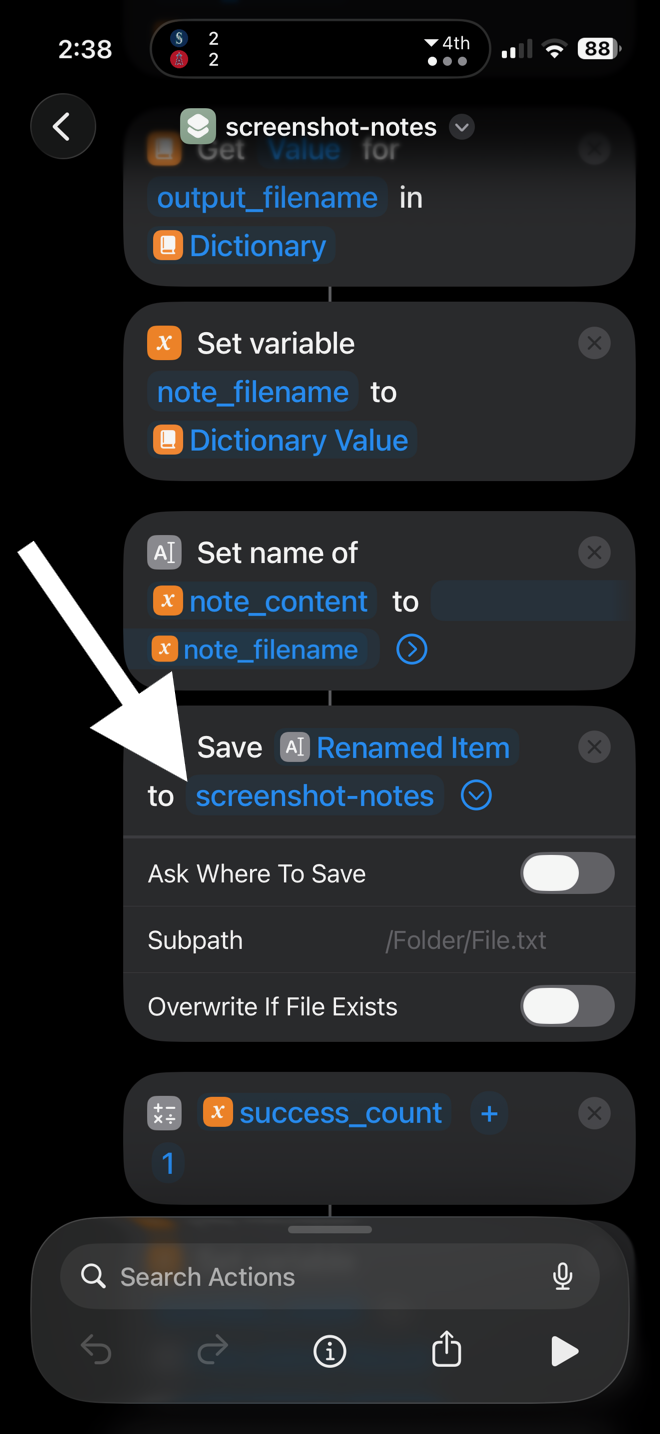
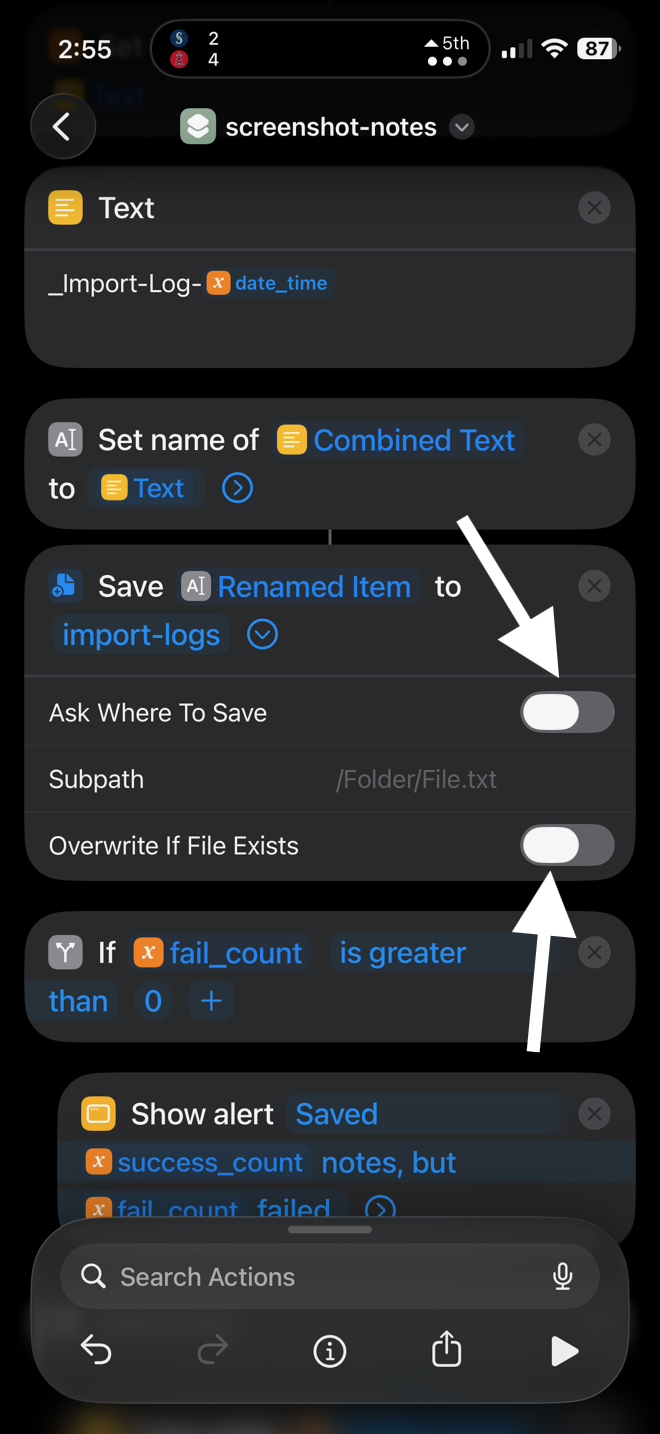
On the Save action, leave Ask Where to Save and Overwrite If File Exists un-checked. Leave Subpath blank.

If either toggle is on, the Shortcut will prompt you on every run or silently overwrite existing notes — neither is what you want.

Close-up of a Save action with Ask Where To Save toggle off, Subpath blank, and Overwrite If File Exists toggle off. White arrows point to both toggles confirming they are off.
Both toggles off; Subpath blank.
Step 06

Now do the same for the second Save File action

Scroll further down the Shortcut until you find the second Save File action. It reads:

Save Renamed Item to import-logs

Tap its destination field and repeat the folder-selection process from Steps 03 and 04. Pick the same folder as your notes, or a separate logs folder — your call (the screenshots below show a dedicated logs folder).

Shortcut editor scrolled to the second Save File action, showing 'Save Renamed Item to import-logs' inside a block of surrounding actions.
The second Save File action — for the per-job log file.
Inside the Obsidian folder in iCloud Drive, showing the screenshot-notes subfolder with an Open button in the top right. A white arrow points to the Open button.
Select a folder and tap Open.
Inside the screenshot-notes folder, showing several recent note files plus an import-logs subfolder in the bottom-right corner.
A separate 
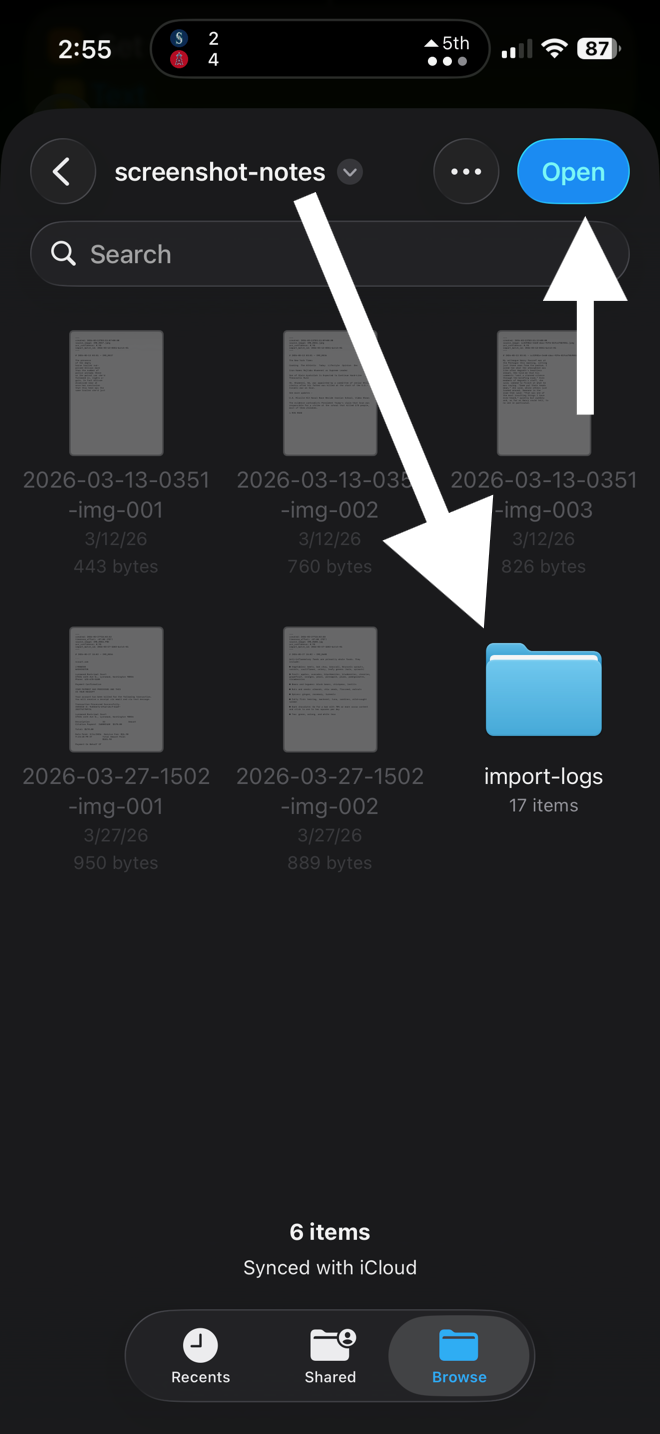
import-logs subfolder keeps the log file out of the way of your notes.
Step 07

Confirm the toggles on the logs action too

Same drill as Step 05: leave Ask Where to Save and Overwrite If File Exists un-checked, and leave Subpath blank.

Close-up of the Save Renamed Item to import-logs action. Both Ask Where To Save and Overwrite If File Exists toggles are off, with white arrows pointing to each toggle.
Both toggles off on the logs action too.
Step 08

You're done

Check that both destination folder names in the Shortcut now display in blue. That means the paths are set and valid. Close the edit view.

From here, the Shortcut is ready to use. Select screenshots in Photos → tap Share → choose Screenshot Notes, and your notes will land in the folders you just picked.